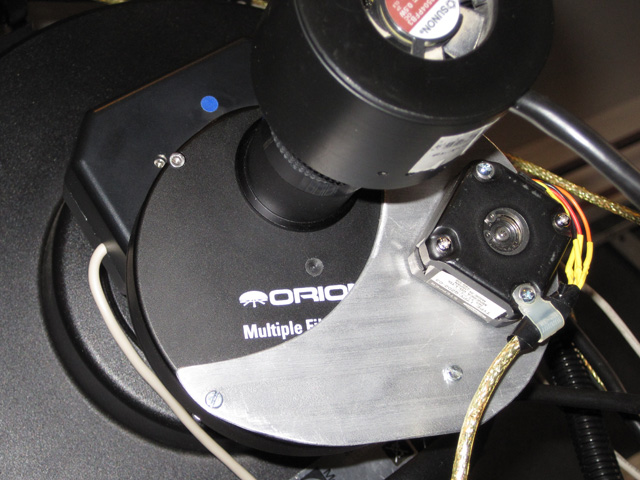
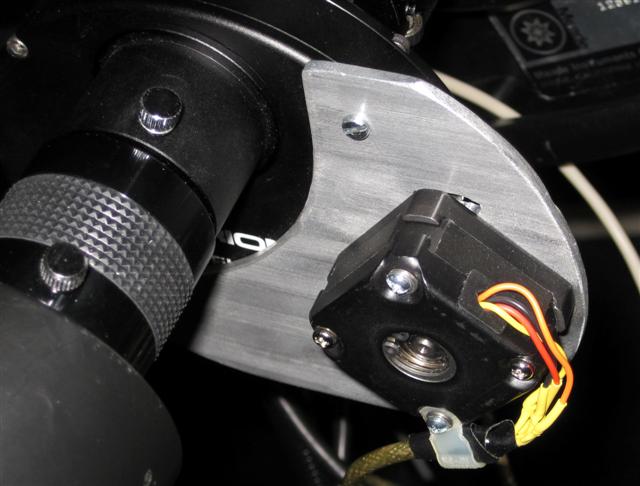
The first step was to remove the little plastic spring-loaded plunger from inside which held the wheel in the appropriate spot for each filter. With the plunger removed, the wheel spins very freely and requires little torque to turn. I had on hand a Minebea Astrosyn bipolar stepper motor. It operates at 5VDC, 0.4Amp, and 400 steps/revolution. It is really too heavy and powerful for this application, but I could not find another motor with as fine of control. The motor's 4mm shaft was just the right size to fit with a small length of 3/16" I.D. rubber hose from the local auto parts store.
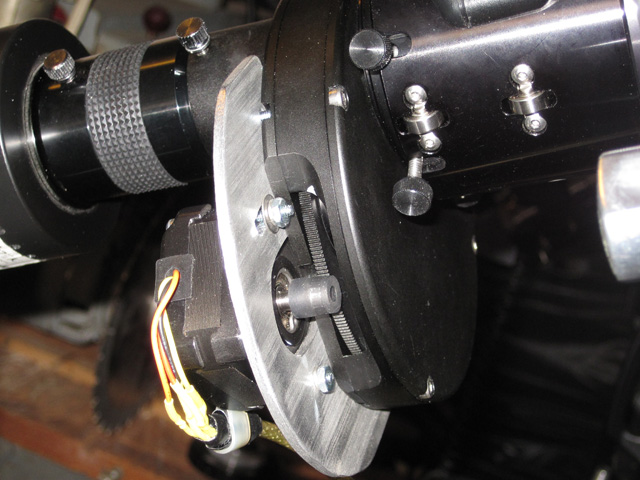
I milled the aluminum plate to allow for adjustments to the motor so that the rubber wheel contacts the threaded edge of the inner filter wheel snugly. The plate attaches to the filter wheel using three of the cover screw holes and extra long screws. The motor is wired with an old USB extension cable.
To drive the stepper motor, I use an Arduino (an open-source electronics prototyping platform) and a motor shield. The Arduino connects to a PC with a USB serial port adapter and has a separate 5VDC power input, which is connected to a spare USB port. Since USB ports provide a standard 5VDC power supply at 0.5Amp, I was in business.
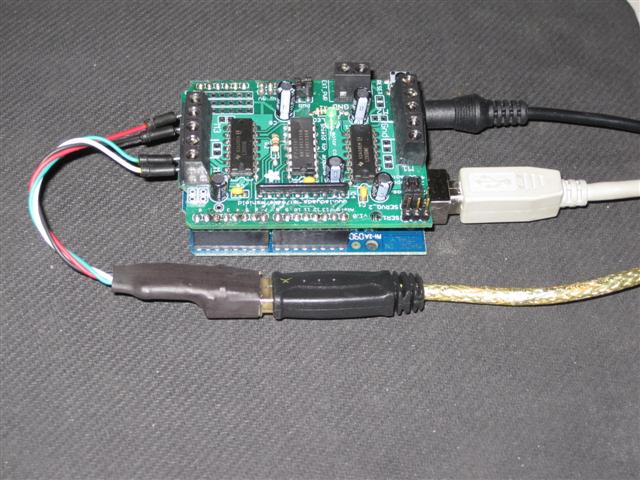
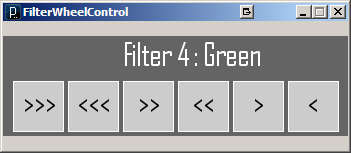
The Arduino is programmed with the freely available Arduino software. In addition, interfacing applications can be written for the Arduino with the Java-based open-source development platform Processing. My program includes buttons for advancing the filter wheel forward and backward, as well as in smaller increments to assist with alignment. I wrote in a routine to keep track of which filter is being used at the time.
Here is the code for programming the Arduino itself, using the Arduino software:
#include <AFMotor.h>
AF_Stepper motor(400, 2);
int i = 0;
int incomingByte = 0;
void setup()
{
// start serial port at 9600 bps:
Serial.begin(9600);
motor.setSpeed(150);
establishContact(); // send a byte to establish contact
}
void loop()
{
// if we get a valid byte, read analog ins:
if (Serial.available() > 0) {
incomingByte = Serial.read();
i = 941;
switch (incomingByte) {
case 65:
motor.step(i, BACKWARD, DOUBLE);
break;
case 66:
motor.step(i, FORWARD, DOUBLE);
break;
case 67:
motor.step(50, BACKWARD, DOUBLE);
break;
case 68:
motor.step(50, FORWARD, DOUBLE);
break;
case 78:
motor.step(10, BACKWARD, DOUBLE);
break;
case 85:
motor.step(10, FORWARD, DOUBLE);
break;
}
}
else {
motor.step(0, BACKWARD, DOUBLE);
}
}
void establishContact() {
while (Serial.available() <= 0) {
Serial.print('A', BYTE); // send a capital A
delay(300);
}
}
|
The Processing code for controlling the wheel:
import processing.serial.*;
Serial myPort; // The serial port
char sendCMD = 'Z';
// Requires the Button class
Button button1, button2, button3, button4, button5, button6;
int mode = 0;
int i = 0;
String[] config;
String[] filter;
void setup() {
config = loadStrings("config.txt");
filter = loadStrings("filters.txt");
i = int(config[0]);
PFont font;
font = loadFont("AgencyFB-Reg-32.vlw");
textFont(font);
textSize(32);
size(345, 100);
smooth();
color gray = color(204);
color white = color(255);
color black = color(0);
button1 = new Button(10, 45, 50, gray, white, black, "Advance");
button2 = new Button(65, 45, 50, gray, white, black, "Back");
button3 = new Button(120, 45, 50, gray, white, black, "Center");
button4 = new Button(175, 45, 50, gray, white, black, "DeCenter");
button5 = new Button(230, 45, 50, gray, white, black, "Nudge");
button6 = new Button(285, 45, 50, gray, white, black, "UnNudge");
println(Serial.list());
String portName = Serial.list()[1];
println(portName);
myPort = new Serial(this, portName, 9600);
}
void draw() {
background(100);
fill(255);
manageButtons();
noStroke();
fill(0);
// if (mode == 1) {
// text("Advance", 10, 40);
// } else if (mode == 2) {
// text("Back", 10, 40);
// } else if (mode == 3) {
// text("Center", 10, 40);
// }
}
void manageButtons() {
button1.update();
button2.update();
button3.update();
button4.update();
button5.update();
button6.update();
button1.display();
fill(0);
text(">>>", 20, 80);
button2.display();
fill(0);
text("<<<", 75, 80);
button3.display();
fill(0);
text(" >>", 130, 80);
button4.display();
fill(0);
text(" <<", 185, 80);
button5.display();
fill(0);
text(" >", 240, 80);
button6.display();
fill(0);
text(" <", 295, 80);
fill(255);
text("Filter " + str(i) + " : " + filter[i - 1], 120, 30);
}
void mousePressed() {
if (button1.press() == true) {
mode = 1;
sendCMD = 'A';
myPort.write(sendCMD);
i++;
if (i > 5){i = 1;}
config[0] = str(i);
saveStrings("data/config.txt", config);
}
if (button2.press() == true) {
mode = 2;
sendCMD = 'B';
myPort.write(sendCMD);
i--;
if (i < 1){i = 5;}
config[0] = str(i);
saveStrings("data/config.txt", config);
}
if (button3.press() == true) {
mode = 3;
sendCMD = 'C';
myPort.write(sendCMD);
}
if (button4.press() == true) {
mode = 4;
sendCMD = 'D';
myPort.write(sendCMD);
}
if (button5.press() == true) {
mode = 5;
sendCMD = 'N';
myPort.write(sendCMD);
}
if (button6.press() == true) {
mode = 6;
sendCMD = 'U';
myPort.write(sendCMD);
}
}
void mouseReleased() {
button1.release();
button2.release();
button3.release();
button4.release();
button5.release();
button6.release();
} |
And for the buttons:
class Button {
int x, y; // The x- and y-coordinates
int size; // Dimension (width and height)
color baseGray; // Default gray value
color overGray; // Value when mouse is over the button
color pressGray; // Value when mouse is over and pressed
boolean over = false; // True when the mouse is over
boolean pressed = false; // True when the mouse is over and pressed
String title = "";
Button(int xp, int yp, int s, color b, color o, color p, String t) {
x = xp;
y = yp;
size = s;
baseGray = b;
overGray = o;
pressGray = p;
title = t;
}
// Updates the over field every frame
void update() {
if ((mouseX >= x) && (mouseX <= x + size) &&
(mouseY >= y) && (mouseY <= y + size)) {
over = true;
} else {
over = false;
}
}
boolean press() {
if (over == true) {
pressed = true;
return true;
} else {
return false;
}
}
void release() {
pressed = false; // Set to false when the mouse is released
}
void display() {
if (pressed == true) {
fill(pressGray);
} else if (over == true) {
fill(overGray);
text(title, 10, 30);
} else {
fill(baseGray);
}
stroke(255);
rect(x, y, size, size);
}
}
|
http://www.astronomymark.com
|