Home Brew DSLR Cooler
This cooler is designed for a Canon DSLR, but would probably work for cooling one can of beer.
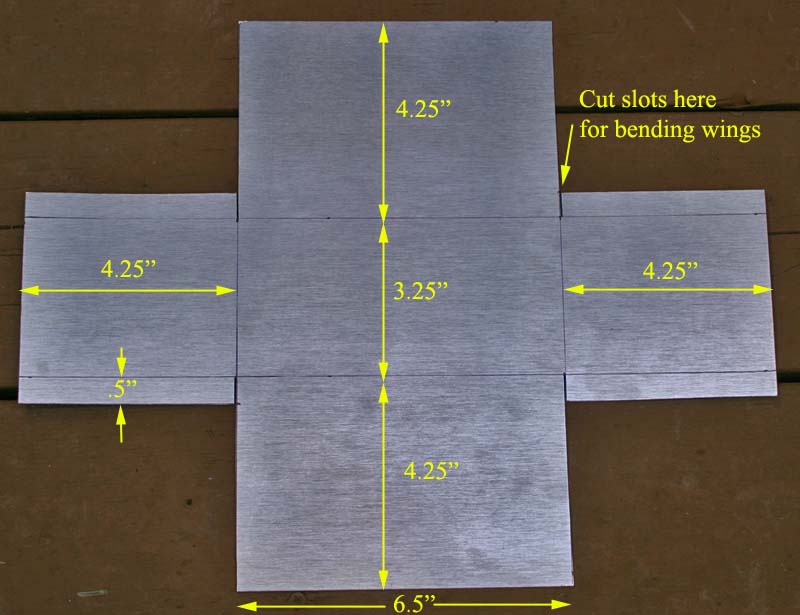
I made this cooler using the basic design from Gary Honis and this image was taken from his website (click on the image to go there). I cut out a piece of aluminum to these dimensions after looking up the size specs on my 350D as opposed to his 450D. Close enough. The dimensions of the 2 cameras (in inches) are: 5x3.7x2.5 (350D) and 5.1x3.8x2.4(450D). I used aluminum sheeting that is designed for manufacturing rain gutter. You've probably seen these guys with the setup on a trailer behind their pick-up trucks. It is a roll of flat material that is fed through a die and makes the gutter on the spot. I got mine from my cousin in Fort Worth who had some scrap. It was perfect for the job and is much easier to cut than the sheet aluminum from Home Depot or Lowes. I used a big honking set of shears (scissors) to cut it, but you could use metal snips, saw, etc.
I didn't use a travel cooler like Honis did. It is a good source for the parts, although the heatsink is a bit large for this project. And, I didn't use the styrofoam cooler, either, because I wanted something more durable for the insulation. Most of the parts came from stuff laying around my garage, so I can't provide the source for some of it.
The TEC pelitier cooler was purchased from eBay from FCB Electronics. It was advertised as "2x 45 W Thermoelectric Peltier *USA 45W 2pcs 2 x pcs" which got me 2 of them for $16, including shipping. This TEC draws about 3 amps at 12VDC, which is why I went with the lower wattage. I tried a higher wattage one, but it drew too many amps and I couldn't power it with my power supply. Plus, I'm not looking to make a deep freezer. I really don't want this thing to go much below the dew point because I don't want a lot of condensation to deal with. If I want more cooling, I'll get a higher amperage unit and just replace the one I have by loosening a few screws and sliding it in.
The two heatsinks were leftovers from PCs (processor heatsinks). I had one for the exterior that worked OK and got one for the interior with a smaller fan from All Systems Go, a used computer part store near my office in the Medical Center. He has bins of them for $5 each. I actually got an old Pentium I heatsink and took a hacksaw and Dremmel after it to make a small and short heatsink for the inside. I tried a heatsink and fan that is designed for a graphics card, but tore it up in the drill press. It was the perfect size, though. For some reason, I get kinda wild when working with power tools...
I drilled a couple of holes through both heat sinks and the side of the case for mounting screws. I actually tapped the interior one so that I could just screw the little bolts directly into it without having to use nuts (shown diagrammatically in red below).
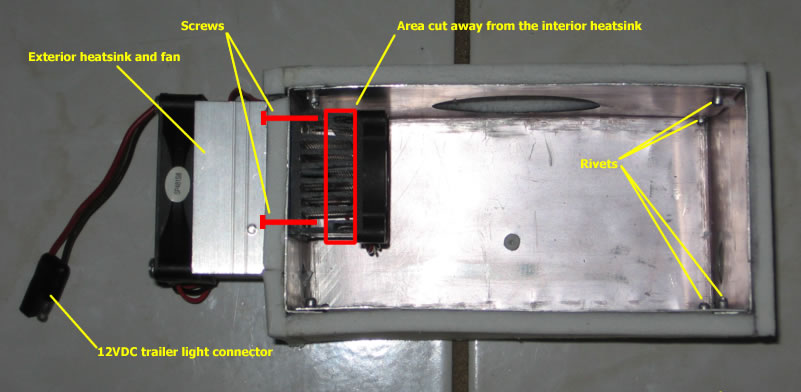
I had a problem with the size of the interior heatsink. Once I connected the cables to the camera, the rubber grommet that covers the jacks on the side of the camera did not fit between the camera and the heatsink fan. So I had to cut down the heatsink as shown in the red box above. Unfortunately, this gave me less of a heatsink, but I figure the effect is minimal since the whole case is actually part of the heatsink and conducts heat away from the interior--because the cold side of the TEC is mounted directly to the aluminum case.
You can also see the trailer light coupling I used for the power supply (on the left side of the photo).
The most challenging part of the construction was the main hole for the camera adapter or lens. I measured carefully to get it at the right size and location. Visible is the hole in the front of the box as well as the mount hole in the bottom. I wanted these holes as small as possible so as to diminish air exchange, so the tolerances got pretty tight.
Here is another image, showing the main hole. I used a hole saw on my drill press to cut it out and then a sanding attachment to smooth out the edges.
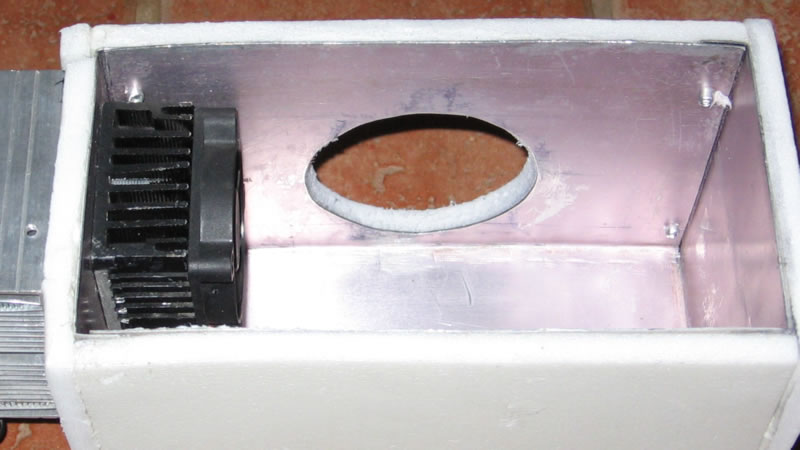
Additional holes were cut in each side for the wires.
I cut the foam in sections to matach the dimensions of the box and glued them in place with 3M spray adhesive. Another piece was cut in a circle with a hole just a bit smaller than the diameter of the adapter. This allowed it to assume a concave shape and seal around the main hole.
The foam also came from eBay. It was advertised as "1/4"x 17"x 60" HiDense Closed Cell Foam Upholstery Foam" and is sold by DGECO FOAM AND FABRIC. It cost me $7 + $6 shipping. It is actually about 1/2" thick. It is pretty tough and lightweight.

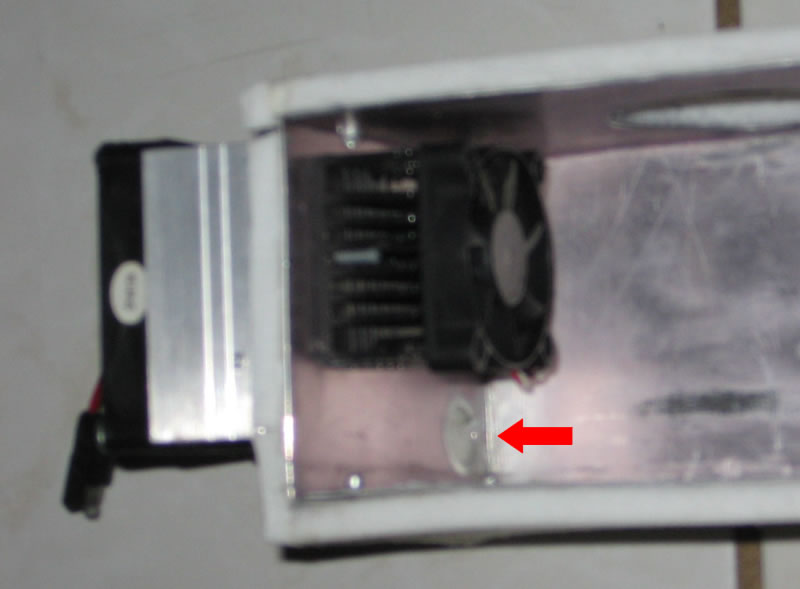
You can see in the above image how closely the camera was to the heatsink and why there was no room for the rubber grommet once the wires were plugged in. The photo was taken before I trimmed down the heatsink.
I made the cover out of the same foam, with a smaller piece glued in place to fit snuggly when pushed in place.
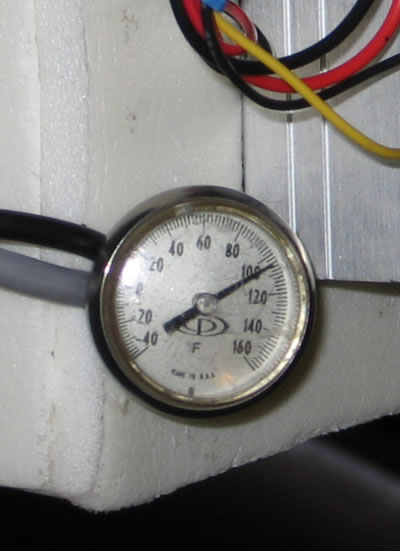
The proof is in the pudding. So, I cranked it up while in my garage around 3:30pm and tested it out. Yes, it was 105°F. After 30 minutes, the box showed 75°F, which is a nice 30° drop from ambient.

In actual use, the drop was more like 25°. Here's the rig in use:
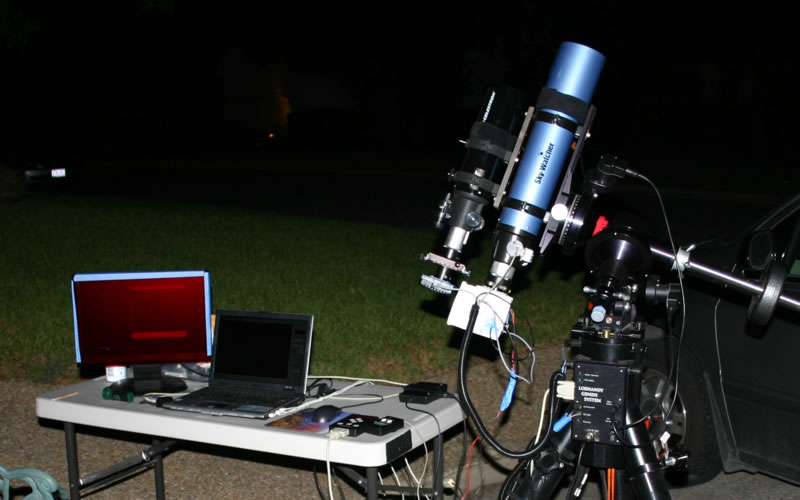
Still some tweaking to do. The box is much bigger than a camera, so I'm going to have to make some adjustments to my mounting hardware to allow my guide scope to move forward enough to allow the DSLR/box to rotate without hitting my DSI guide camera. This will also help with the balance problem I experienced by adding the extra weight to the backend.